Synopsis
At this point, we've touched on all of the key elements of MATLAB programming: data types, data structures, control structures, scripts, functions, and plotting. Now it's time to put these elements together and tackle one of the most common tasks--batch processing. In this lecture, we will lay the groundwork for a motion tracking MATLAB program.
Daily Quiz
Batch Processing
Why do we use MATLAB? For nearly every type of analysis, you can find freeware with a nice graphical interface to perform the calculations. And if you are just crunching a few numbers, graphical programs are typically the better option because they allow you to get to the answer faster. But what if you have many files to analyze? You could perform the same calculation in a graphical program over and over, but this is not scalable. MATLAB becomes useful when we need to repeat an analysis for large amounts of data--either many individual files or one big file. The act of performing the same analysis on multiple files is called batch processing, and MATLAB provides a great platform for such tasks.
In this lecture, we will learn how to tackle a batch processing job. For our example, we will be performing motion tracking on video files. Why videos? In order to track moving objects, we will need to detect motion in each frame of our video via batch processing. The data for this example was extracted from a live webcam on the Oxford College of Emory University website.

These videos actually consist of a split view. For our work, we will be focusing on the right half of the second video. You can find the raw image data in the zip file below.
Motion Tracking
When approaching a batch processing job, it's silly to try tackling the entire thing at once. Instead, we should try to solve the problem for just one image, and then see if our solution works for the remaining images. Let's begin by formally defining our goal.
Goal: Write a motion tracking MATLAB program that processes each image in a video sequence for a moving object, and displays a bounding box around the detected object.
File List
If we plan to process a batch of images, we need to get a list of the paths to these image files. For this example, we will work with the second video sequence. We can use MATLAB's built-in dir function to get a list of the contents of our data directory. dir will return an array structure with the name, size, type (ie. directory or file), and date. What we really need is a cell array of full file paths.
We can extract the file names from the array structure by indexing for all entires that are not directories. Since the names might not be the same length, we will store them in a cell array.
1
2
3
4
5
6
rootdir = 'set2/';
ext = '.jpg';
files = dir(fullfile(rootdir, ['*' ext]));
dirIdx = [files.isdir];
files = {files(~dirIdx).name}';
Now that we have the file names, we can convert them to file paths by combining them with our variable rootdir.
1
2
3
4
5
6
numFiles = length(files);
%build full file path
for i = 1:numFiles
files{i} = fullfile(rootdir,files{i});
end
Background Image
To detect motion in our images, we need to think about what we mean by the word "motion." We will define motion as an object moving across some stable background. Fortunately for us, the webcam is fixed and the only movement in the image must come from objects. We can see that the background in our video consists of a brick walkway with a bench. But how do we get the computer to identify the background?
There are several different ways we could define the background image for our video sequence. We could grab a frame of the video that is void of objects (ie. people). This would be easy, but has some drawbacks. The video contains a lot of random noise, and using a single frame will result in that particular set of noisy pixels being defined as part of the background. Instead, we will use an average of all frames in the video sequence.
To take the average over all frames of the video, we simply need to add the values from each frame and divide by the total number of frames. We should keep in mind that the images are stored as uint8, and will need to be cast as double to perform this calculation. Since we have all of our file paths store in the file cell array, we can loop over this array and add the values as we go.
1
2
3
4
5
6
bg = double(imread(files{1}));
for i = 2:numFiles
tmp = double(imread(files{i}));
bg = bg + tmp;
end
bg = uint8(bg/numFiles);
Preprocessing
Our raw video data has some issues: color images are difficult to process, we are only interested in the right half, and the images are quite noisy. We will need to write a function for preprocessing each image of our video before we can go further.
The conversion from color to grayscale can be accomplished using MALTAB's rgb2gray function. Then, we can use indexing to crop out the right half. Finally, we can apply a filter to reduce the noise. We will bundle these steps into a function called mtpreproc.
1
2
3
4
5
6
7
8
9
10
11
12
13
14
function [ img ] = mtpreproc( img )
%MTPREPROC Preprocesses an image for motion tracking
% This function performs a series of preprocessing steps to an image.
% convert to grayscale
img = rgb2gray(img);
% crop to right half
img = img(:,345:end);
% remove noise with median filter
img = medfilt2(img, [5 5]);
end
We can now apply this preprocessing routine to our background image.
1
bg = mtpreproc(bg);
Let's take a quick look at the cleaned background image.
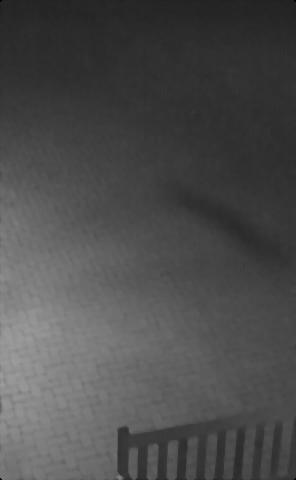
Now we need to grab an example image that contains an object. We will use this image to test how well we can detect the object. For simplicity, we'll grab and preprocess im45.jpg.
1
2
eximg = imread(files{45});
eximg = mtpreproc(eximg);
Here is im45.jpg before preprocessing.

Remove Background
Earlier we defined the background of our image. In order to isolate the moving object, we need to remove the background from the video frame. To do this, we simply subtract one image from the other. To help reduce noise, we will also apply another median filter.
1
2
diffimg = eximg-bg;
diffimg = medfilt2(diffimg, [5 5]);
Here is what the image looks like after background subtraction and median filtering.

Since we subtracted the background, most of the image is now black. The only visible regions correspond to the person in the image. How do we get the computer to identify the person? Well, we need to separate the person from the black background. This can be done with thresholding.
Thresholding
Thresholding allows us to separate pixels above a certain value from pixels below a certain value. We can use the Data Cursor tool in MATLAB's plot window to explore the values of the background subtracted image (diffimg). We then pick a value that separates the person from the background, and use a logical expression to create a logical matrix called mask.
1
mask = diffimg > 25;
In the image below, logical 1 corresponds to the white regions and logical 0 corresponds to the black reigons.
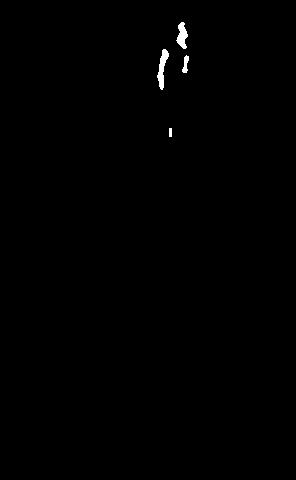
If we'd like to draw a box around the object, we need to determine the locations of the 1 values in mask.
Bounding Box
In order to create a bounding box around our object, we need to know the minimum and maximum row/column indices where mask is equal to 1. We will do this in two steps--one for rows and one for columns. We can use the any function to tell us which rows/columns contain the value 1, and the find function get the indices of those rows/columns. Then, we can write an anonymous function to provide the minimum and maximum indices from those vectors.
1
2
3
4
5
6
maskx = any(mask, 1);
masky = any(mask, 2);
minmax = @(x) [min(x), max(x)];
x = minmax(find(maskx));
y = minmax(find(masky));
x =

   158   189
y =

    23   137
Plotting the Image
We now have the coordinates that define our bounding box. To plot the bounding box on the image, we will use several MATLAB functions. We will first plot the image with imshow. We can then tell MATLAB that we want to plot on top of that image with the statement hold on. Then, we can use the rectangle function to create our bounding box from the x and y values. Lastly, we will turn off hold.
1
2
3
4
imshow(eximg);
hold on
rectangle('Position', [x(1) y(1) x(2)-x(1) y(2)-y(1)], 'EdgeColor', 'green', 'LineWidth', 1)
hold off
Here is what our original image looks like with the bounding box drawn.
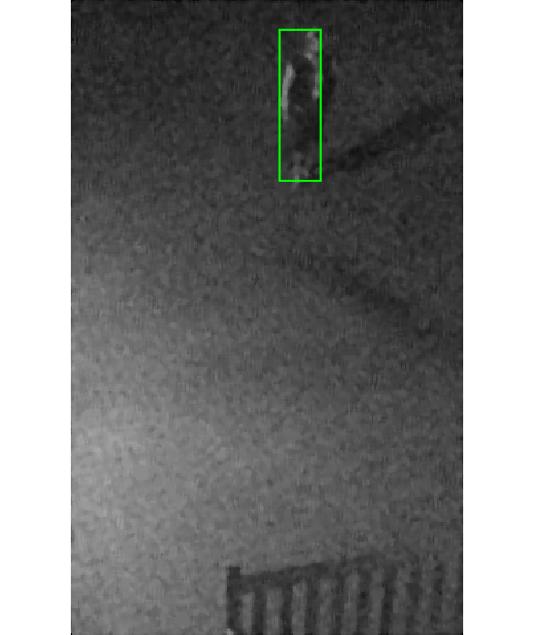
Final Words
Awesome! We were able to detect a person in one of our video frames. This required us to define a background image, preprocess our images, remove the background, generate a mask, find the bounding box of the object, and plot the results. Now that we have everything working, we will modify our code in the next lab to perform this process in batch. At the end of the lab, we will have a video like this...